How to Animate Items Out of an Array in React
Nick Scialli
March 28, 2021
Animating items out of an array in React can be trickier than you’d think. If you have tried to roll your own solution yet, you have likely been frustrated by the fact that, once your state has been updated with an item removed, it’s gone (and hard to hold on to for the sake of animation!).
A Couple Approaches
There are a couple approaches to this problem that I’ll discuss.
- Rolling your own solution (very much not recommended)
- Using
react-transition-group(use this!)
Clearly, I favor using the established package over rolling your own solution. I have rolled my own before and it was complicated and buggy. Still—after I discuss the preferred solution I’ll do a quick write-up on how I rolled my own.
A Simple Todo List Example
Let’s get into a simple example—a todo list. Here’s the code for a todo list that remove items from the list without any animation:
import { useState } from 'react';

const initial = ['Walk dog', 'Sweep floors', 'Do homework'];

export default function App() {
  const [todos, setTodos] = useState(initial);

  return (
    <ul>
      {todos.map((todo) => (
        <li key={todo}>
          {todo}{' '}
          <button
            onClick={() => {
              setTodos(todos.filter((t) => t !== todo));
            }}
          >
            Delete
          </button>
        </li>
      ))}
    </ul>
  );
}
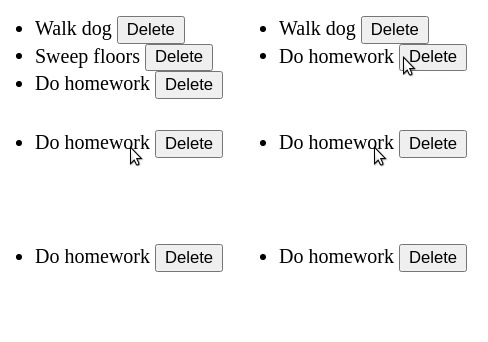
If we test drive the app, we see the following. Again, items being removed from the list without any animation.

Using react-transition-group
react-transition-group offers some super helpful components that can help with animations. To use this package, we first have to install it.
If you’re using npm, you can run
npm i react-transition-groupOr if you’re yarn, run
yarn add react-transition-groupThe first thing we’ll want to do to animate removing items from the list is to wrap the items we’re animating in a TransitionGroup component. The TransitionGroup component takes its own component prop that will allow us to specify what type of DOM element (or custom component) should be used. In our cases, the transition group is inside an unordered list, so we can use the string "ul".
import { useState } from 'react';
import { TransitionGroup } from 'react-transition-group';

const initial = ['Walk dog', 'Sweep floors', 'Do homework'];

export default function App() {
  const [todos, setTodos] = useState(initial);

  return (
    <TransitionGroup component="ul">
      {todos.map((todo) => (
        <li key={todo}>
          {todo}{' '}
          <button
            onClick={() => {
              setTodos(todos.filter((t) => t !== todo));
            }}
          >
            Delete
          </button>
        </li>
      ))}
    </TransitionGroup>
  );
}
Next up, we have to actually tell each item how to animate. To do so, we’ll use another component: CSSTransition. This will be inside our todos map and will take a few arguments:
- a
key(since it’s the outer-most component inside a list) - a
timeout, which specifies the transition time - a
classNamesprop, which will be a class we can use to style our transition
import { useState } from 'react';
import { CSSTransition, TransitionGroup } from 'react-transition-group';

const initial = ['Walk dog', 'Sweep floors', 'Do homework'];

export default function App() {
  const [todos, setTodos] = useState(initial);

  return (
    <TransitionGroup component="ul">
      {todos.map((todo) => (
        <CSSTransition key={todo} timeout={700} classNames="item">
          <li>
            {todo}{' '}
            <button
              onClick={() => {
                setTodos(todos.filter((t) => t !== todo));
              }}
            >
              Delete
            </button>
          </li>
        </CSSTransition>
      ))}
    </TransitionGroup>
  );
}
Looking good! One last piece: we need to actually have styles associated with our item. By convention, react-transition-group will use the following styles:
.[classname]-enter {
}
.[classname]-enter-active {
}
.[classname]-exit {
}
.[classname]-exit-active {
}
Since we’re currently only worried about animating the exit of an item from our list, we can actually get by with only using the .item-exit-active class:
style.css
.item-exit-active {
  opacity: 0;
  transition: opacity 700ms ease-out;
}
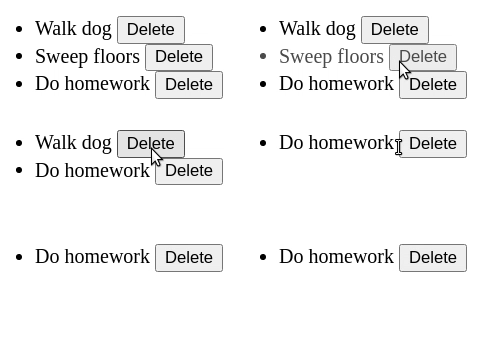
Here, we’re saying that, when the transition is active, set the opacity to 0 but with a 700ms ease-out transition.
We can incorporate this into our app by just including the style now.
import { useState } from 'react';
import { CSSTransition, TransitionGroup } from 'react-transition-group';
import './styles.css';

const initial = ['Walk dog', 'Sweep floors', 'Do homework'];

export default function App() {
  const [todos, setTodos] = useState(initial);

  return (
    <TransitionGroup component="ul">
      {todos.map((todo) => (
        <CSSTransition key={todo} timeout={700} classNames="item">
          <li>
            {todo}{' '}
            <button
              onClick={() => {
                setTodos(todos.filter((t) => t !== todo));
              }}
            >
              Delete
            </button>
          </li>
        </CSSTransition>
      ))}
    </TransitionGroup>
  );
}
And if we run our app, we can see the transition working swimmingly:

Rolling Your Own Solution (Not Recommended!)
For completeness, I figured I might as well discuss how you could go about doing this yourself—although I don’t recommend it at all.
First, you’d need to maintain a cache of items. This is because you’d need some way to hold on to an item long enough to animate it. You’d want to detect when a item is removed so that you could start the animation process. Finally, you’d want a timer to actually remove the item after animation is complete.
You may end up mixing CSS transition and JavaScript. You’d have to figure out how to handle multiple items being removed at the same time and make sure their timeouts work independently. Finally, you’d need to make sure to cancel any timeouts still going if the component unmounts or else you’ll have a memory leak.
Doesn’t sound fun, does it? I promise, it isn’t!
Conclusion
Animation with React, especially when removing items from state, can appear complex. Fortunately, we have packages like react-transition-group that can help us get the job done in short order!

Nick Scialli is a senior UI engineer at Microsoft.